
You may have noticed that DC UL Backpacking has its first bikepacking trip on the calendar coming up on June 29 and 30.
If you’ve backpacked before, then bikepacking is not really too much different. It’s just a different mode of transportation. I’ve always felt that bikepacking is a little easier on the body than backpacking, and gives you the option to pack more if you want (gear, dry clothes, food, etc.).
Below, I discuss two popular local trails. The C&O Canal is a canal towpath that’s been repurposed as a multi-use trail. It is approximately 184.5 miles long, starting in Georgetown in Washington, DC, at Mile 0, and ending in Cumberland, Maryland. The Great Allegheny Passage, or the GAP, picks up where the towpath leaves off. The GAP is a repurposed rail track spanning 150 miles from Cumberland, Maryland, to Pittsburgh, Pennsylvania.

The GAP picks up where the C&O leaves off. Photo: Carrie P.
In this post, I’ll cover the key pieces of equipment, and some smaller essentials, that you’ll need to complete a bikepacking trip. You’ve probably heard of “The Big Three.” I wrote about choosing your big three on my own blog some time ago. In backpacking, this describes your shelter, your sleep system, and your pack.
Since bikepacking requires two wheels and a pack/bag system, let’s consider “The Big Four.”
The Big Four
One: A Bike
Bikes are sold under many different names. You may see terms like: gravel bike, adventure bike, mountain bike, hybrid bike, touring bike, or road bike.
The truth is that it matters very little what kind of bike you have, as long as it can accommodate your packing system and you feel comfortable on it.
The point that I really want to make is that the best bike for bikepacking is the bike that you already own. There’s a lot of marketing for specialized equipment when getting into new hobbies, and all the gear is not really necessary. As with backpacking, you can always take a few trips first and upgrade later based on your comfort.
Tires
If you do have a skinny-tired road bike, consider switching out your tires for 30mm or wider for a more comfortable ride.
It doesn’t matter if you have slicks (smooth) or knobbies (lugged) tires. Consider the terrain you’re likely to encounter. Knobby tires makes sense for mud because they are less likely to fishtail and get stuck. Wider tires, regardless of their surface texture, can provide a more comfortable ride over an uneven surface, allowing the rider to ride with lower air pressure for a more cushiony ride.
The best bike for bikepacking is the bike that you already own.
There are three bike accessory necessities that I’ll add for any type of bike adventuring, in the spirit of always being prepared and safe:
- Helmets: I am a big proponent of helmets. Regardless of how safe you ride, a head injury is a head injury, and a helmet minimizes the risk. On many multi-use trails throughout the US, they’re required.
- Bike Lights: You may find yourself stuck in the dark on an unfamiliar trail, or approaching a long tunnel with no internal lighting. Having bike lights available is always a good idea.
- Locks: Recent years have seen an increase of usage on trails like the C&O and the GAP. Although I used to camp without a lock, I’ve heard too many reports of valuables disappearing from campsites overnight. Now, I’ll always lock my bike to another bike, a tree, or a picnic table while I sleep in the tent.
Two: A Sleep System
Aren’t you relieved to hear that it’s the same thing you would use for backpacking? Whether you use a hammock or a pad and quilt or sleeping bag, it doesn’t matter, just as long as you can carry it on the bike somehow.
Three: A Shelter
You really don’t have to change anything about what you’re already doing. Whether you’re using a tent or a tarp, it only matters that you can pack it on your bike.
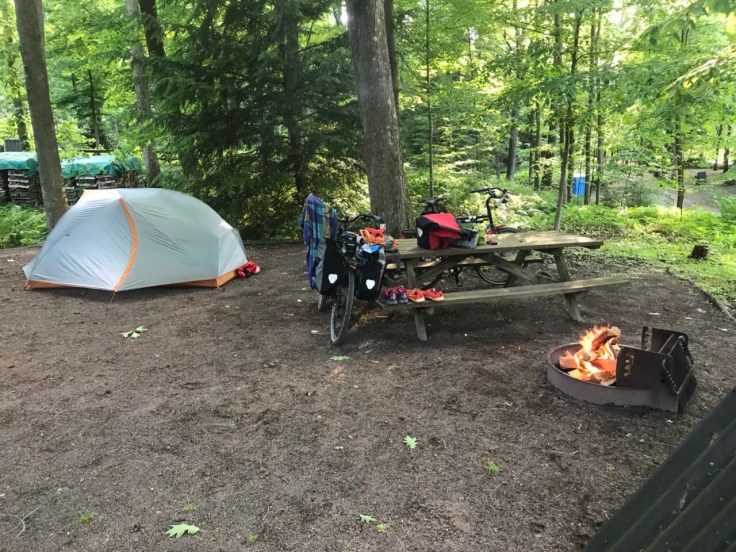
A cozy camp at Husky Haven Campground in Rockwood, PA, on the GAP. Photo: Carrie P.
Four: Packs and Bags System
Let’s first get some trendy definitions out of the way. Understanding how retailers describe these items will help you when making purchasing decisions.
- Touring bags/Panniers: Touring bags or panniers are attached to front or rear racks on the bike. This means you must consider also purchasing and installing the rack(s), which is not difficult to do with a bike multi-tool.
- Bikepacking-specific bags: Bikepacking-specific bags is a recent trending term that describes bags that attach to the frame, seatpost, or handlebars bags through snaps, loops, or ties. These bags do not require racks.
Why would you consider one over the other? The panniers can carry quite a bit. As long as they are balanced, you hardly notice they’re there. However, not using a rack and panniers is preferred on rougher terrain for reasons such as balance, bounce, agility, and weight.
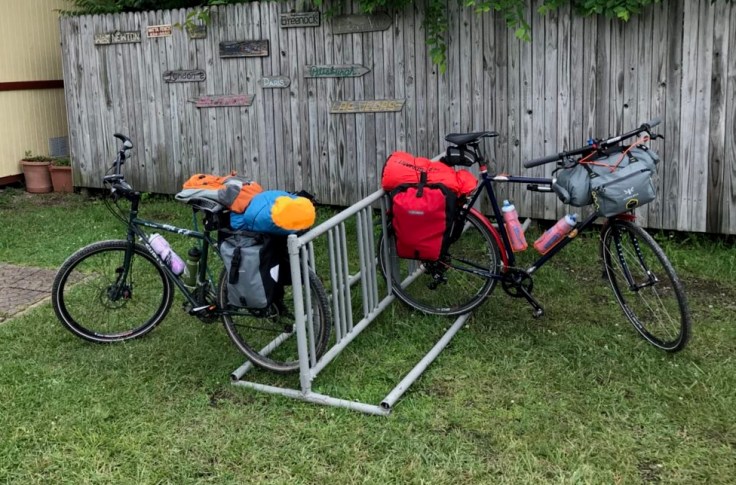
Bikes packed for bikepacking with a mix of touring and bikepacking bags. Photo: Carrie P.
Some well-known bag brands are Ortlieb, well known for making durable, sometimes waterproof panniers as well as more recently, bikepacking-specific bags. Apidura makes gorgeous and lightweight bikepacking-specific bags. Revelate Designs sells bikepacking-specific bags including a lightweight Dyneema handlebar bag. If you’re unsure about what you’d prefer, start with an affordable option and upgrade when you’ve had more experience. I bought my first panniers very cheaply from Bike Nashbar, although REI and Sierra Trading Post carry the occasional bike accessory.
Now that we’ve covered the Big Four, let’s look at other small essentials.
As I noted above, bikepacking allows you to be a little more luxurious when packing. I don’t hesitate to bring my Kindle Paperwhite, at least one change of daytime clothes, and sleeping clothes. Additionally, I bring rain gear, a stove, and my food. If you are curious, do a search for “how to pack bags for bikepacking.” There are plenty of videos with good advice.

A hiker/biker campsite along the GAP in Pennsylvania. Photo: Carrie P.
In addition to the Big Four, let’s look at other bikepacking essentials:
- Multi-tool: a multi-tool can be used to adjust your handlebars and seat, and some other handy things
- Spare Tube: just in case one of your tubes gets punctured beyond repair
- Patch Kit: just in case one of your tubes gets punctured
- Air Pump: just in case you need to add air pressure to a flat tire
- First-Aid Supplies: same as backpacking
- Straps or Cords: in the event that you don’t put everything in a pannier or bag, you can fasten it to a rear rack with bungees
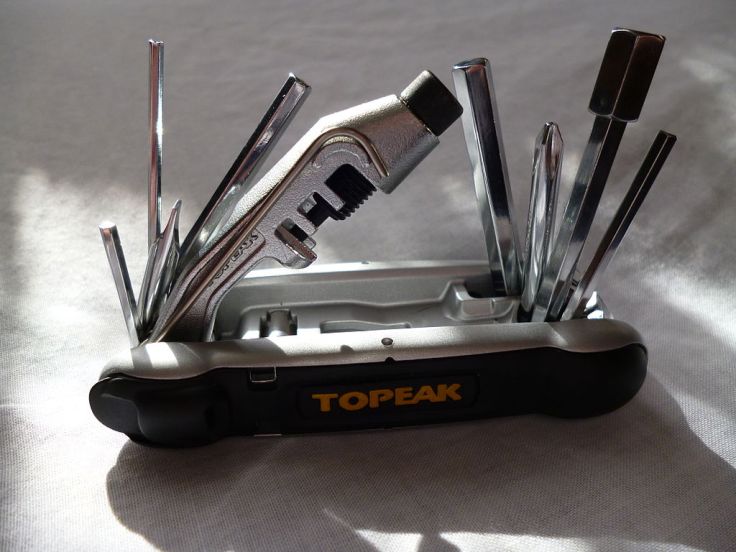
Above: Bike Multi-tool. Photo: Armchair [CC BY-SA 3.0].
The most important thing is that if you carry these items, you should know how to use them. Otherwise they won’t do you any good. It doesn’t hurt to try them out at your house before you need them in an emergency.
As for me, I have bikepacked the C&O Canal twice and the Great Allegheny Passage three times in entirety. I’ve also done some brief overnight trips and the beautiful Pine Creek Rail Trail in north-central Pennsylvania. At one point in my life, I had the goal of riding a rail trail in every state. A great resource for planning out bikepacking trips if you’d like to stick to multi-use bike paths is the Rails to Trails site. They maintain a database of trails on TrailLink. You can search by location or keyword, and then filter by distance and surface. It’s been a wonderful resource for planning bikepacking trips.
I’ve found that people, including myself, are capable of more than they think. Riding a 50-mile day on a relatively flat, linear rail trail is a lot different than a 50-mile road ride. Will I be sore and whiny at the end of the day? For sure. But when I leave the trail I’ll already be planning my next trip.
My own hard lessons learned:
- Aside from a water bladder pack, don’t plan to carry much weight at all on your back. You’d be surprised at how the weight on your back can affect the pain in your seat.
- Even though towns are usually plentiful along rail trails, plan to fill up water at every chance you get and have a backup plan for purification. I’ve run into situations where I was expecting a water pump but it was turned off.
- Same for food. Although you may run into convenience stores along your route, plan to carry plenty of snacks just in case.
My best advice is to plan the days, pack the bags, and get out there on the bike and start pedaling.
If you decide to get really hardcore into bikepacking, there’s a terrific Facebook group, Bicycle Touring and Bikepacking, that you can join to crowdsource ideas and planning. Also, check out Bikepacking.com’s gear lists section that may help you plan your own.
And if you want to stay closer to home and take advantage of the two gems in our own backyard, see the GAP Trail site which details both the C&O Canal Towpath and the Great Allegheny Passage with interactive maps and resources. They’ve even released a GAP Trail App which covers the C&O and GAP.
I’ve had a lot of people ask me about bikepacking over the years. There’s a lot of trepidation over this mode of travel which seems to leave people in the planning stages. You’re never far from help on the bike, and the people I’ve met on the trail have always been friendly and willing to help a cyclist in need. My best advice is to plan the day(s), pack the bag(s), and get out there on the bike and start pedaling.
